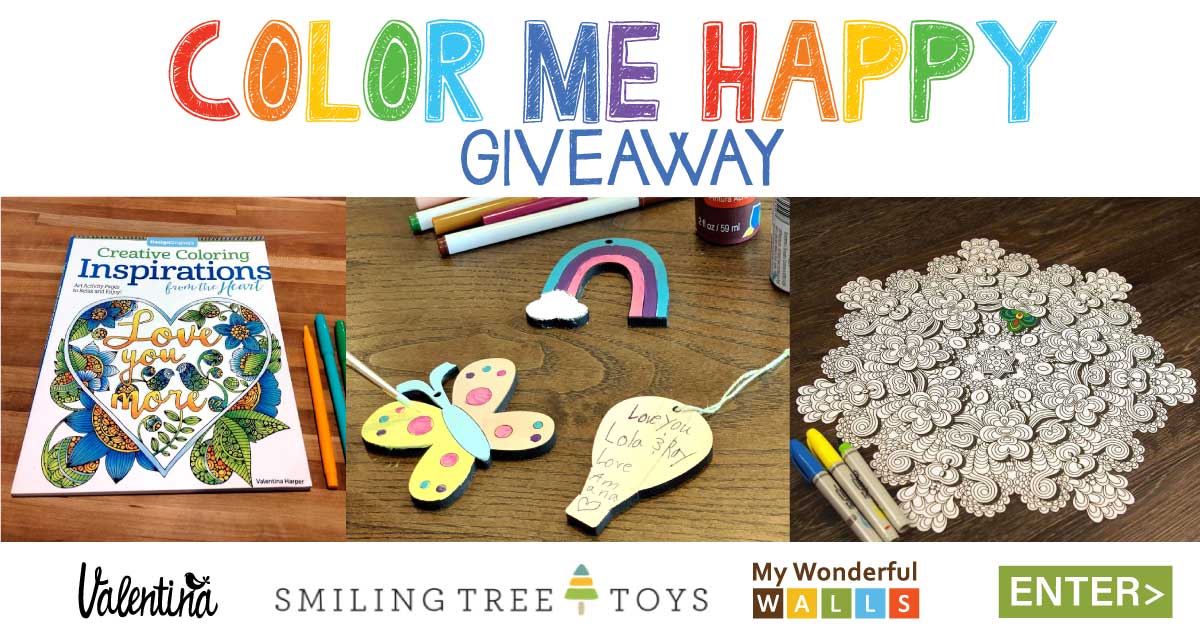
Log-in
Wall Stickers - Wall Stencils - Wall Murals 
Search
 

Love of Travel and Animals Inspires Jungle Safari Mural

Posted on May 24, 2013 by Stephanie | 0 comments


Jungle Safari Kids Mural

We asked Breana, mom of Talen, age 2 to tell us a little bit about how she created his new big boy room with our Jungle Safari Wall Mural Stencil Kit. Read what she had to say about her inspiration for the room and her experiences with My Wonderful Walls.


MWW: Who is the wall mural you painted for?
Breana: Our son Talen, who is 2.

My Wonderful Walls: Can you tell us a bit about yourself?
Breana: I'm a stay at home mom so I'm always coming up with some project to do. In between projects we travel a lot. Some of my hobbies are painting, quilting, pottery, shopping and reading. We love the outdoors, just not in the cold Montana winter. 

MWW: What inspired you to choose the Jungle Safari Wall Mural Stencil Kit? Frog Wall Stencil
Breana: I decided to go with the jungle safari theme because my son loves animals so much. He also loves cars/trucks so he got the best of both with his bed. We were switching him from a crib to a big boy bed, so I thought if he had an awesome room it would be a lot easier- and it was. I really loved the coloring and texturing of the stickers.... but at the same time I had an itch to paint it myself. After exchanging a couple fast and friendly emails with Stephanie I had the confidence to take on the stenciling project with the sticker look as the goal.

MWW: You created a quite unique look with your stenciling; can you tell us how you achieved it?
Breana: I did use the sponge a lot. I found that using a small sponge with little gaps worked best. Using this type of sponge allowed for finer detail versus the normal sponge.I found mine at hobby lobby or Joanne fabrics. The next tool I found helpful was this little bell like sponge thing. I used that on the clouds, elephants and the tree tops. With the trees- I sponged on the lightest color first (which was a dark brown mixed with light brown and white), then the light brown and finished it off with the dark brown. With the elephants-I painted on the light blue and waited until it was almost dry but still a little wet. I then took the bell looking sponge with a tiny amount of dark blue paint and kind of brushed it across the top lightly. Then I took another sponge with no paint on it and blended it. For the face - I used a bell sponge and brushed the face with the paint from ears, same thing waited until it was a little dry. For the clouds- I painted the white on. Let it dry. Used a bell sponge and swirled light blue through. The leaves- I painted darkest greenfirst and then sponged a lighter color on top. I tried to mix up the leaves with greens to give it more contrast. The toucan beak- I did it in sections. I painted it the orange first. Then I swiped the yellow through, then the next color and painted the tip red. For other animals such as the tiger, zebra,giraffe- I just lightened the color with some white and sponged it on.  

Elephant Wall Mural for KidsMWW: What was Talen’s reaction to the wall mural when he first saw it?
Breana:  I attached a picture of Talen "helping" me. I love how focused he looks. The next one is when his elephant arrived and his room was complete. His cheesy smile says it all. He loves it.

MWW: How long did it take you overall to complete the project?
Breana: 3 weeks but we were traveling a lot during the project.

MWW: What did you enjoy most about the wall mural creation process?
Breana: I enjoyed blending the paint and coming up with my own color combinations. I found myself staying up late at night to work on the mural because it was so calming and fun. I loved watching it progress and had fun deciding where to put everything.

MWW: Did you add any finishing touches to the standard wall mural?
Breana: I did. My son recently watched the movie Madagascar and loved it. Since there are jungle animals in the movie, I decided to figure out how many miles it was to Madagascar. (The answer in case you’re wondering can be seen in the photo below!)

MWW: Do you have any helpful tips for the people who use our products, especially our stencils?
Breana: Don't be afraid to blend colors. If you make a mistake it is incredibly easy to fix! I also started with the trees being my first stencil. It's may seem a little overwhelming on where to place animals and such,  so I found by placing the trees first relieved a lot of the stress. After that it was a breeze. Also, I stenciled leaves and flowers where the dresser and his bookcase are in case furniture got moved in the future. (I didn’t want a bare spot.)

MWW: Tell us a little about your experience with the product and with the My Wonderful Walls folks in general.
Breana: It was awesome to deal with the people at My Wonderful Walls. If I asked a question I got a FAST, friendly response. They truly value their customers. I thought that I needed to replace my treetop stencil (something being my fault completely)  but they walked me through it and gave me tips on how to fix it rather than selling me another one which I appreciated so much! The stencils hold to the wall beautifully. And my walls were even somewhat textured. Overall a very well thought out setup. They make it as easy as it can be.

Well shucks Breana, thanks for the compliments! We definitely value our customers. Now that you've seen our Jungle Safari Wall Stencils in action, start your own wall mural project today. Check out our FAQ page and video tutorials for more information and ideas. Whether you buy our wall stencil kits, individual stencils,wall sticker kits or canvas wall art, we would love to hear from you next!

Bell Sponge for Stenciling Wall MuralsElephant Wall StencilZebra Wall StencilToucan Wall StencilJungle Kids Room

Jungle Safari Wall MuralGiraffe Wall Stencil for Kids RoomJungle Flowers Stencil for Wall MuralPersonalized Jungle Theme Wall MuralTiger Wall StencilJungle Safari Tree Stencil

  Painting Kids Wall Mural

Blog post written by Tara 

Continue reading →

Polka Dot Mural for a Newborn Princess

Posted on May 03, 2013 by Stephanie | 1 comment

Polka Dot Wall Mural

Jeremy and Megan, who live in Trempealeau, Wisconsin, welcomed home their first baby girl on April 20, 2013. In anticipation of her arrival, they set out to create a beautiful nursery mural; after searching Google for different ideas for nurseries, they found My Wonderful Walls and chose our Polka Dot Wall Mural Stencil Kit. Although they looked into wall stickers, Jeremy and Megan decided that painting would leave them with a huge sense of accomplishment and a feeling of pride that they did something so amazing for their daughter. They were also excited about the chance to spend time together on a special project before bringing their new little bundle home to stay.

Jeremy really put a lot of time and effort into this project for his little girl. He describes himself as creative, but not necessarily artistic. He works as a 'computer guy' and knew he needed to do some pre-planning before slapping some paint on the walls. Being a tech-savvy fellow, he created a digital image of the baby’s room and used his computer skills to lay out where each polka dot would go.

Megan put in a ton of effort and thought to the project as well. In fact, once the polka dot stencil kit arrived, Megan took the initiative to cut out nearly 100 colored dots with construction paper, placing them on the walls exactly where she wanted Jeremy to paint them. 

In order to prepare for the project, Jeremy checked out our online videos on how to use the stencils while he was waiting for the kit to arrive. Overall, their experience was great, and the couple was anxious to share the new space with their darling baby.

Since they have textured walls, the duo had to get creative with how they applied the paint so it would look polished and crisp once dry. For others looking to replicate their painting process, Jeremy recommends that you place the stencil on the wall and paint the base color on the inside edge of the stencil to create a seal. Once that dries, go ahead and paint the polka dot the color you wish and let it dry, then peel the stencil away. This will provide you with a perfectly shaped and sealed circle, thanks to the coat of base paint on the inside edge.

Jeremy also jokingly recommends not putting up so many dots, as it made for a long day and a long process. However, he does admit that he absolutely loves the room and wouldn't change the design he and his wife brought to life in any way. 

Together, it took Jeremy and Megan one day to create all of the polka dots, and another two days to add some stripes, which Megan's father helped with. Before baby had even seen the room, they posted many pictures on Facebook and their friends have all commented on how impressed they are at the finished room.

Thanks Jeremy and Megan for sharing your wonderful, heartfelt room makeover with us, and congrats on your bundle of joy!  To all our My Wonderful Walls readers, if you enjoyed reading this customer spotlight, please leave a comment below.


Continue reading →

Garden Themed Mural Inspires Imagination

Posted on May 01, 2013 by Stephanie | 1 comment

Splendid Garden Wall Mural

When Pauline set out to create a beautiful and magical space for her 3-year-old daughter, Jasmine, in their Las Vegas home, she knew from the start what she wanted in a children’s wall mural. She and her daughter love everything about the outdoors, including animals and flowers; Jasmine especially loves frogs. When Pauline decided to search online for kids wall murals, she found our Splendid Garden Wall Mural Stencil Kit and fell in love. Along with the DIY stencil kit, she purchased the foam brushes and paints because the color scheme we suggested was not only bright and girly, but was exactly what Pauline had imagined.

In the past, Pauline had used wall stickers from other companies, but this time she was looking for something a little longer lasting. She also wanted something that would provide Jasmine with the understanding that her mommy spent love, time, and effort on a special room just for her. 

Flower Garden Girls RoomThe project itself took Pauline about 1½ weeks to complete, as she has another baby girl to take care of and could only work on the room for a few hours or minutes, at a time. Although she can be very creative and is comfortable doing arts and crafts, Pauline was surprised at how easy it was to use the wall stencils. She enjoyed working on Jasmine's room so much that she kept imagining other rooms of their home she could redecorate with the help of some of our other kits. 

Although Jasmine was a little too young to help with the painting, she was excited beyond words, particularly with the frog. This is a room that provides inspiration to both Jasmine and her father's imaginations. Each night as he tucks her into bed, they make up stories based on the characters on the wall. Pauline mentioned that it is so amazing and funny, to see and hear how Jasmine's imagination is really growing. She has named the butterflies William and Billiam, and these two are always the main characters in her and her father's stories. She hasn't left any of the other characters out, though, providing them with names – her name, her sister's name and her cousins’ names – making sure everyone has a special spot in each nightly story.

Pauline really loved using the stencil kit and was glad she purchased the suggested paint to go along with it as well. She commented that it really takes the guesswork out of deciding which colors to use, and was also a tremendous time saver. She also was happy to find that she had plenty of paint left over, which she is saving for touch-ups. Pauline was pleased with how easy the stencils were to use, and that they were made of durable materials with very sticky adhesive; this allowed her to reuse them repeatedly to create a room filled with personal touches and whimsy. Garden Girls Room

Growing up, Pauline's father was an oil painter in his spare time, so painting was something she always wished she could do, especially for her children. She says that she is very proud of the room she created, and is sure her father would have been too. She has since decided to tap into her inner artist, and feels more comfortable with painting and becoming more creative.

Thanks for sharing this awesome room with us, Pauline! If you would like to see your wall mural and family featured on our blog, please fill out our Customer Spotlight form.  


Continue reading →

Outer Space Wall Stencils + Mom’s Love Make One Great Room

Posted on April 29, 2013 by Stephanie | 1 comment

Space Themed Room 

When Miguel, 6, looked at our site with mom Maria he was initially drawn to the Ocean Themed Wall Murals but later changed his mind to a Space Themed Room. No wonder with all the fun planets, stars, rocket ships and astronauts; what child wouldn’t love a room like that? Maria was happy to oblige and knew she wanted to use our self-adhesive stencils to create his special room to get the best results. All told the mural project took her only 3 days and she was thrilled to show it off to the My Wonderful Walls blog audience. 

Maria chose stencils over fabric stickers as she felt they would look better on her son’s walls. She says that once she got started, though having never painted a mural like this before, it was easy to get comfortable with the process.  Maria enjoyed working on the space room and felt bad throwing away the stencils (don’t worry folks, they are reusable). Her favorite element? The craters. What was Miguel’s reaction to the room? He loved it! Maria plans to try to incorporate a few additional elements like Phineas and Ferb to the mural. 

What was Maria’s advice to any other customers wanting to paint a mural with our stencils? This NYC mom says less paint is good and try sticking four stencils on at a time and then rotating them. By the time you get to the fourth, the first one is dry and can be ready for a second coat. 

Maria reports that she loved working with My Wonderful Walls and plans on starting her daughter’s room next. We can’t wait to see the pictures. With the love of a mom and a little help from our easy to use wall stencils, we know the next room will be as wonderful as the first!

 Space Themed Boys Room

Continue reading →

Country-Loving Cowboy Gets a Farm Themed Room

Posted on April 26, 2013 by Stephanie | 0 comments

 Farm Themed Mural

If you happen to hear the phrases "yee-haw" and "giddy-up cowboy" while your little ones are playing, you might want to consider creating a Farm Theme room for them, much like Leslie and Ted did for their 3-year-old son, Tucker. 

In talking with Leslie and Ted recently, they mentioned that they chose the Farm Theme stickers because of the beautiful colors and designs they contained. However since their son loves everything to do with farming, especially tractors and cows, the choice to do a farm and cowboy themed room was a simple one. This only seems fitting as the family lives out in the country on a farm in Lenoir, North Carolina.

When Leslie, a stay-at-home mom, is not hiking in the mountains or swimming she enjoys spending time with her family. She wanted to bring the beautiful outdoors inside to her son’s room with a colorful and fun room decorating kit, which is how she found the My Wonderful Walls website.

Although Leslie originally attempted to order the wall stickers via the website, she had a few difficulties getting her internet to play nice. Fortunately, she made a quick phone call to our customer service department and was pleasantly surprised at how helpful the My Wonderful Walls staff was at solving her problem and helping her get the order placed and scheduled for shipment. 

Having never used wall stickers before, Ted and Leslie enlisted the help of the instructional videos and sample room photos available on the My Wonderful Walls website. They loved how easy they were to learn from, and referred to them several times throughout their own sticker application process. 

In order to help them visualize where they wanted to place the stickers to create a perfect barn and farm theme, Leslie and Ted used Scotch tape to temporarily hold the stickers in place. This allowed them to easily move the stickers around – something they definitely recommend for others.

Barn MuralLeslie and Ted were able to complete the project in less than 3 days; all in all they both thought the project was a lot of fun and much easier than they had initially expected it to be. Although farmer Tucker did not directly participate in creating his room, he was very excited when it was completed. His favorite sticker, and perhaps the favorite for all of the family, is the barn, which made his eyes light up when he saw it. 

My Wonderful Walls enjoys hearing from our customers and hopes that you do too. We try to provide a little piece of what someone has found helpful when using our products so that others may benefit from it. If your or someone you know would be interested in using wall stickers – of which there are many themes available – check out the wall sticker section of our web site at www.mywonderfulwalls.com and get MOO-ving on your next room makeover project for your child.

Continue reading →

 
Scroll to top