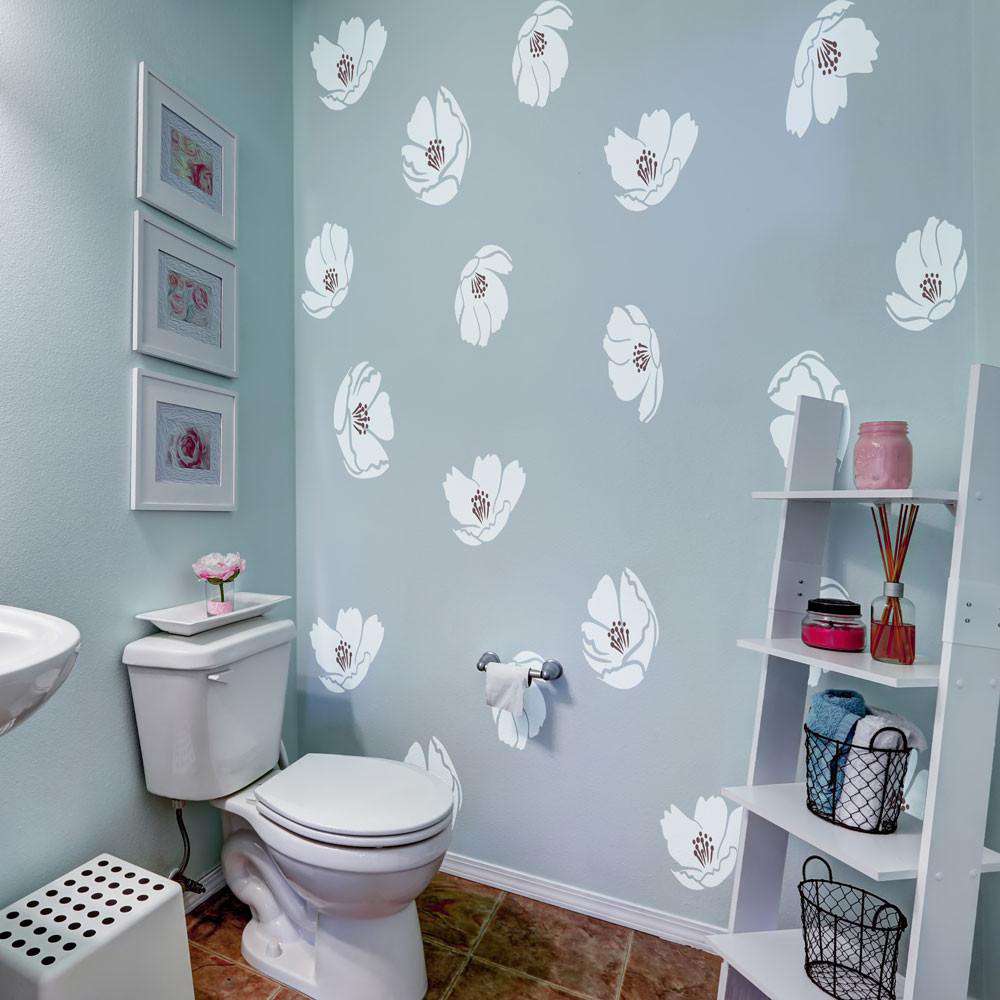
Reminding us that life is fragile, our cherry blossom wall stencil set will add a delicate and elegant touch to your DIY project.
- 6 stencil set for multiple Cherry Blossoms (includes 3 blooms and 3 sets of stamens)
- Cherry blossom wall stencils are available in 2 sizes
- Self-adhesive stencil - no glue or tape needed
- Perfect for walls, home improvement projects, crafts and more
- Easy to use DIY cherry blossom wall stencils
Vivid and lovely! This Cherry Blossoms Stencil Set will to add warmth and tranquility to your space. Painting with our flower stencils is so easy to do, and you won’t need any tape or glue as these stencils have a self-adhesive backing. Just peel the cherry blossom stencil from the backing paper, stick it to your painting surface, paint in, and remove. It's that easy! This cherry blossom flower stencil design is available in 2 sizes and can be used for walls, furniture, accessories, crafts, projects and more!
AVAILABLE SIZES IN INCHES
Medium: 4.9"w x 7.7"h , 5.3"w x 3.5"h , 3.4"w x 4.7"h
Large: 11.4"w" x 11"h , 12.2"w x 8"h , 7.8"w x 11"h
*To achieve the same look as the wall in the instructional video, you'll need all three cherry blossom stencils and stamens in size large.
HOW TO USE A CHERRY BLOSSOM STENCIL
- Gently peel one cherry blossom flower stencil from the backing.
- Hold the cherry blossom stencil by the top two corners, pulling outward, keeping the top edge tight and straight. Then, place the cherry blossom flower stencil on the wall. Rub it with your hand, working your way down the stencil, making sure that all inner edges are down to avoid any bleeding.
- Apply a very thin coat of paint and let dry. Apply additional coats as necessary.
- Add in stamens and additional blooms as desired.
- Peel the stencil of a cherry blossom from the painted surface and return it to the backing paper if done or repeat as needed.
EXTRA STENCILING TIPS
- To avoid stencil bleeding, use a paper towel to remove excess paint from your roller or brush.
- You can use a hair dryer to speed up the drying process.
- When re-applying the cherry blossom stencils, pat down with a paper towel to remove paint buildup.
- Save some of your base-coat paint for touch-ups.
- After you wash your roller/brush make sure it is completely dry before using it again.
- We recommend a foam roller for this cherry blossom stencil pattern. Use a small foam roller for a medium herry blossom stencil and stamens or a larger roller for the large wall stencil. Stencil brushes or flat top bristle brushes can be used to shade and add texture to the cherry blossoms.
- You can stencil with a variety of paints. We recommend using high-quality hobby acrylic paint, latex paint, artist acrylic or stencil paint. If using for outdoors, try an exterior latex paint for projects like a fence or acrylic paint with a clear coating of polyurethane spray for projects like a mailbox.